
 Video Mill : User's Guide
 Contents
 Language
 Product Home
Automator - Actions Shortcuts
 Page Bottom
What Are Shortcuts?
An Action Shortcut definition is a way to map key signals to the Automator actions below. For example, you can create an Action Shortcut that will map keys Ctrl+P to the Play Step action of the Automator. There are also Ad Hoc Shortcuts that allow you to map specific Scripts and/or Media Items to a key signal.
Quick Start
These are the basic steps to using Actions Shortcuts.
- Create Shortcuts - Create the Actions Shortcuts for the Media List (see next sections). Save the Media List after adding them.
- Turn On Actions Shortcuts Processing - Click Behavior > Enable Actions Shortcuts. The menu item will show a check-mark when active.
- Focus the Automator - Make the Automator the 'Focused' window so that it will recieve the Remote's button press signals. Click on the Automator's window Title Bar to focus it.
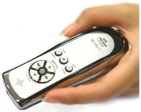
- Power on Remote - Insert the remote's USB wireless receiver and power on the remote.
- Test It - Now the Automator is ready to receive and process remote button presses. Test a shortcut to confirm the Shortcuts mode is working.
 To Page Top
Automator Actions
The following Automator Actions can be controlled by a remote control device by Actions Shortcuts. They are the same functions described under the Automator Actions menu.
Listing 1. Automator ActionsRun Script Stop Script Pause Script Resume Script Play/Replay Step Stop Step Next Step Previous Step First Step Last Step Volume Up Volume Down Mute Select Next Script Select Previous Script
Setup Checklist for Remote Operation
Actions Shortcuts Defintion Creation
Shortcuts Defintion Creation is a one time setup.
- Discover the Remote Key Signals - The remote manufacturer's user's guide may list the key signals for each remote button. If not, use our Key Mapper Tool to discover which key signals are sent by each remote button. Save them in a text file for future reference.
- Create an Actions Shortcuts Defintion - Details below. The resulting Defintion will be saved as a Favorite Shortcuts Defintion.
Performance Time Setup Steps
The Operation steps below should only take a minute to perform once you become familiar with the procedure. Some mode settings are remembered by Video Mill from session to session.
- Select an Actions Shortcuts Defintion - Go to Automator > Tools > Actions Shortcuts > Load Actions Shortcuts > Pick Favorites to Load. This configures the Automator to recognise the Actions Shortcuts.
- Set the Automator for Remote Control Operation - Go to Automator > Behavior > Input Device - Remote Controller (the menu item will be checked when in Remote Control mode). The Automator does a few things differently in Remote Control mode.
- Set the Automator Behavior - Go to Automator > Behavior and set the behaviors you need based on the capabilities of the remote device. See the Behaviors section for details.
- Make Automator Window Active - Make sure the Automator window is active (click on the window to make it the active, focused window). See Automator Window Focus detail below.
- Select a Script to Run - In the Automator window, select which Script you want to run in the list selector panel.
- Select the UI mode - Although you can operate the Automator UI (user interface) in any UI mode, you will likely want to use a special UI sizing so you can read the Step List selector from a distance (to keep track of your place in the script). Select the UI Remote Control Mode (or your own custom favorite) from View > User Interface Favorites > Pick UI Favorite to Use menu. (Also see UI note below.)
- Run the Script - If you assigned a remote button to the Run Script action, just click the button. If not, you have to run the Script by clicking the Run Script button in the Automator.
- Operate by Remote - At this point, the Automator should be reading signals from the remote.
Automator Window Focus
Only the Active window will receive key signals from the remote device (this is a Windows OS feature). A window is made the Active window when you mouse click on it to give it focus.
When the Automator plays a video it opens a new window for the video -- and Windows automatically gives it focus to make it the active window. The trick is that focus needs to be returned to the Automator so it can continue to receive key signals. Video Mill returns focus to the Automator automatically after a second or two. You can adjust the timing of this return focus, by setting Wait Time for Restore Window Focus in the Automator Options. This time must be (at least) long enough for a Media Screen to setup and begin playing. The timing is dependent on the speed of your computer, so you'll need to play a few videos to see how your system responds.
UI for Remote Control Devices
 Warning -
It is best when setting the UI (user interface) for Remote Control Devices to Hide the Run Controls buttons panel. Remotes that send the key signals for the Up and Down arrow keys (and a few other navigation keys) may not work if the Run Controls panel gets focus by clicking one of its buttons. It's best just to keep it hidden and use the toolbar buttons instead if needed.
Warning -
It is best when setting the UI (user interface) for Remote Control Devices to Hide the Run Controls buttons panel. Remotes that send the key signals for the Up and Down arrow keys (and a few other navigation keys) may not work if the Run Controls panel gets focus by clicking one of its buttons. It's best just to keep it hidden and use the toolbar buttons instead if needed.
How to Create an Actions Shortcuts Defintion
An Action Shortcut definition is a way to map key signals from the remote to the Automator actions (Listing 1).
Steps Summary
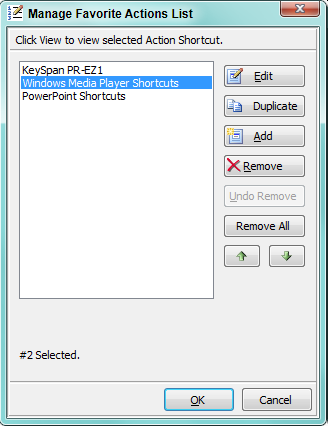
- Go to Tools > Actions Shortcuts > Manage Favorite Actions Shortcuts. Then click the Add button to create a new definition.
- Select the new definition from the list, then click Edit (Figure 1).
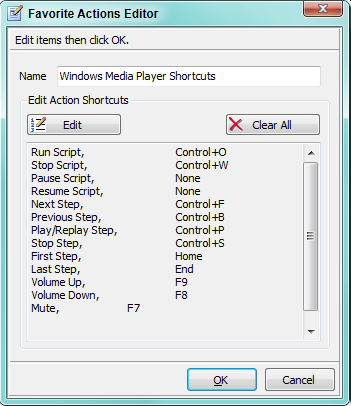
- In the Actions Shortcuts editor (Figure 2), click Edit. The Clear All button resets all action keys to "None".
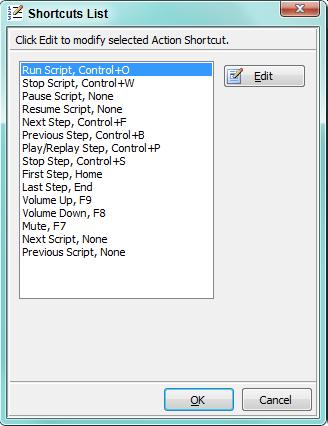
- In the Shortcuts List (Figure 3), select an action in the list, then click Edit.
- In the Shortcuts Editor ( Figure 4), set the key plus Modifier key (if any) to associate to the action. Repeat this step for all actions you want to associated with keys. For actions that you will not use with the remote, set the key to "None".
Note: If you are also using Ad Hoc Shortcuts, be sure not to use duplicate shortcut keys. For example, if you assign Ctrl+S to both an Action Shortcut and a Ad Hoc Shortcut, the result will be unpredicable.
It is a good practice to save the key mapping after you are finished for future reference. In the Favorite Actions Editor (Figure 2), select the key mapping summary text with the mouse, then copy/paste it to a text file for safe keeping. (Hint: After selecting the text, right mouse-click on it to Copy. )
Shortcut Key Editor
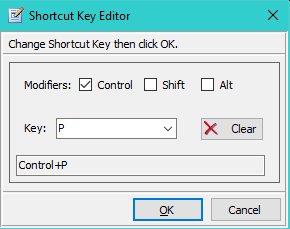
The Shortcut Key Editor (Figure 4) will set the key (or key combination) for the Shortcut. The Modifier keys (CONTROL, SHIFT and ALT) can be added as combination keys (ex Ctrl+P combination) by checking the associated Modifier checkbox. Use the Key pulldown to set the Key. The Reset button clears all Modifiers and sets the key to None.
Notes
- In the Key pulldown, it is recommended that use choices of letters (A-Z), numbers (0-9) or function keys (F1-F24). Using other key values may produce inconsistent behaviors if you are not careful. Also see Reserved Keystokes below. Of course, rules are made to be broken on occasion.
- If you want to nullify any Action Shortcut, set its shortcut key to "None".
- Numbers (1,2,3... ) on the Keyboard may be sent as keystokes "D0", "D1", "D2"...
- Numbers (1,2,3... ) on the Number Pad (when Num Lock is On) may be sent as keystokes "NumPad0", "NumPad1", "NumPad2"....
- PageDown key will map to "Next". (This still works fine in our tests. It's a Windows quirk.)
Reserved Keystokes
Windows Reserved Keys
Windows assigns special system and user interface functions to these keystrokes. Try to avoid reassigning any of these to Shortcuts. You may get unexpected results and in some cases the shortcut will not work.
Windows moves control focus to Next or Previous control: TAB, BACKSPACE.
Windows button push : ENTER, SPACE bar. (same as a mouse click on a button and also used when the Play On Click option is used.)
Windows special purpose keys: CONTROL+ALT+DELETE and ALT+TAB, ALT,
NUM LOCK, PRINT SCREEN, SCROLL LOCK, WAKE, SLEEP, POWER, CAPS LOCK, WINDOWS key.