
 Sound Mill X3 : User's Guide
 Contents
 Language
 Product Home
Skinning with High Contrast Themes
 Page Bottom
Skin the App for a Darkened Venue
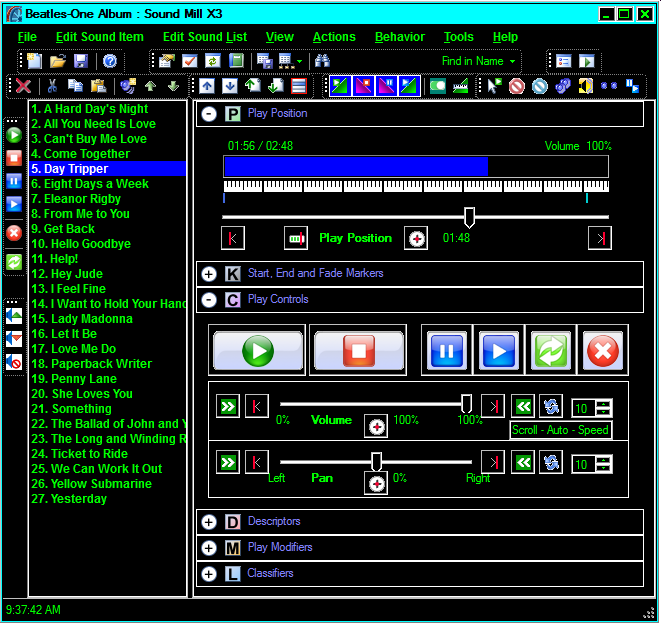
Dark skinning the app (Figure 1.) can help prevent eye strain in a darkened theater or venue. However, a standard Windows Theme appearance is the best choice for sessions when you are creating and editing Sound Lists because buttons and input fields will provide enhanced feedback (selection highlighting, mouse-over hightlight, etc.). Use the dark skins on event night when you are not doing intense editing/designing.
 To Page Top
High Contrast Themes - How To
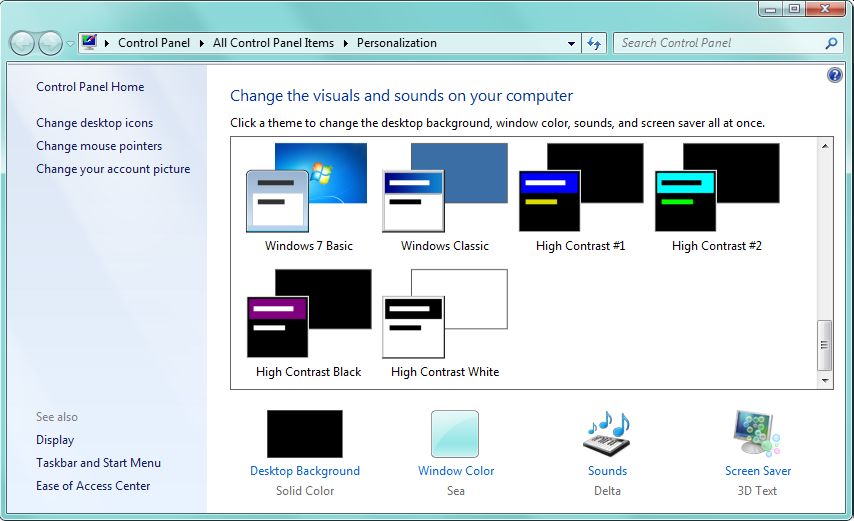
To select a High Contrast Themes, right-mouse-click on the Windows desktop. On the resulting context menu, and pick "Personalize". The Windows Control Panel > Personalization dialog will appear (Figure 2). Select one of the High Contrast Themes by clicking on it. Windows Control Panel > Ease Of Access may provide additional customization for High Contrast (colors, etc) which you can save as a theme.
The High Contrast Themes provided with Windows are fairly basic. There are also many customized High Contrast Themes available for download from the Web. Do a Web search (many are free).
Limitations
High Contrast Themes will NOT render background images on Windows controls (ex on buttons, panels, etc). This will cause the following program anomolies.
Easy Player Controls
- Playback Control Buttons - The images on the large playback buttons (Play, Stop, Pause, Resume ,etc.) will not stretch to fill the buttons when you apply a scale factor to enlarge the buttons.
- Cue Buttons - Images on the Cue buttons will not render. Cue buttons will appear with the foreground color (for text) and background color that you select.